
WHICH METHOD WORKS BEST FOR YOU?
The best meal-prep method is the one that matches how you actually eat: choose batch cooking for speed, ingredient prep for variety, or freezer meals for a longer safety margin.
| Method | Best for | Main strength | Main limitation |
|---|---|---|---|
| Batch cooking | Fast weekday dinners | One recipe makes several portions | Repeated flavors |
| Portioned meals | Grab-and-go lunches | No weekday assembly | Texture declines sooner |
| Ingredient prep | People who want variety | Fresh meals assembled quickly | Some cooking remains |
| Mix-and-match components | Households with different tastes | Flexible combinations | More containers and planning |
| Freezer meal prep | Busy or unpredictable weeks | Longer storage | Requires freezer space |
Your storage space, tolerance for leftovers, and available cooking time will change which option gives you the least work.
How to Meal Prep for the Week: Which Method Works Best?
Batch cooking
Batch cooking means preparing one large dish, such as chili, curry, soup, or roasted chicken with vegetables, then dividing it into several meals. It is usually the simplest starting point because one recipe provides the main protein, carbohydrate, and vegetables.
Choose recipes with sturdy ingredients that hold their texture, including beans, lentils, rice, pasta, carrots, cabbage, and roasted peppers. Cook 3 to 4 days of portions rather than assuming food will remain enjoyable for a full week.
Ready-to-eat portioned meals
Ready-to-eat meal prep involves cooking complete meals and packing each serving in its own container. It suits work lunches, early mornings, and anyone who wants to open the refrigerator and eat without measuring or assembling ingredients.
Pack only what you expect to eat within the refrigerator window, then freeze later portions. This method saves the most weekday effort, but delicate foods such as lettuce, fried toppings, and cut fruit can become soft when stored with moist ingredients.
Ingredient prep
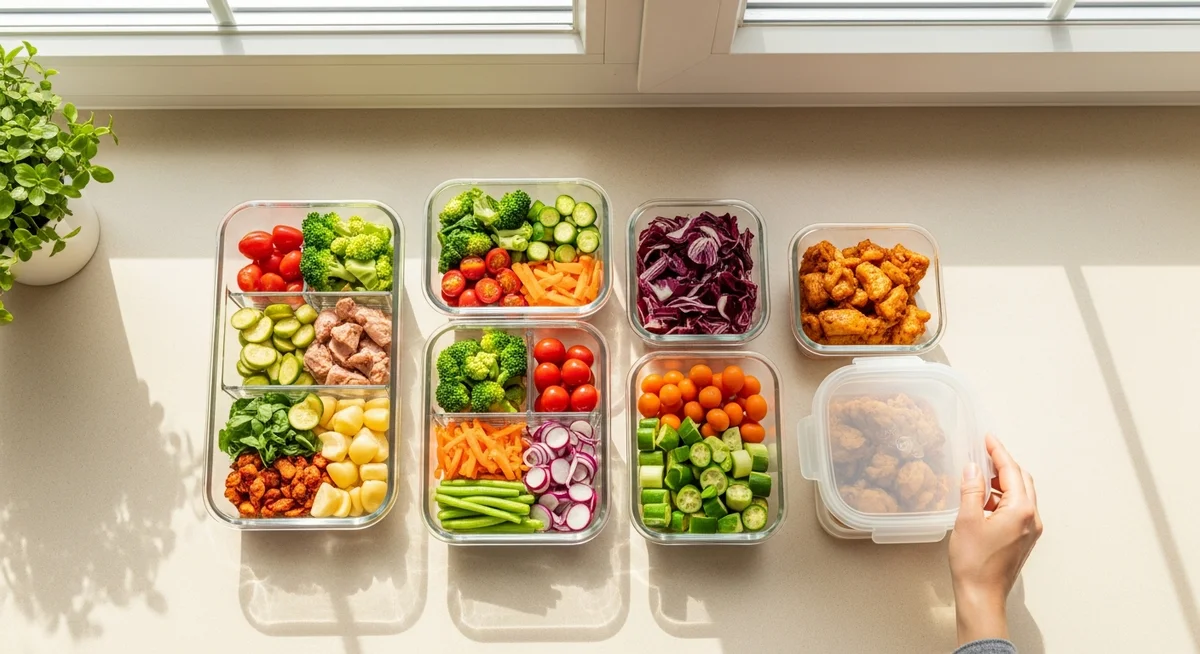
Ingredient prep means washing, chopping, roasting, or cooking separate components without assembling full meals. You might prepare cooked quinoa, boiled eggs, chopped peppers, roasted vegetables, and a dressing, then combine them in different ways during the week.
This method takes slightly more effort on eating days, but it gives you more variety and better control over texture. Keep wet ingredients away from greens and crunchy toppings until serving.
Mix-and-match meal components
Mix-and-match prep combines a few cooked components with several sauces and toppings. For example, cooked chicken, tofu, rice, roasted vegetables, salsa, hummus, and yogurt dressing can become bowls, wraps, or salads.
It works well when two people want different meals from the same shopping trip. Use shallow containers for the cooked foods and small leak-resistant containers for sauces, which usually cost about $1 to $3 each when prices were checked in August 2026.
Freezer meal prep
Freezer meal prep means cooking meals or assembling uncooked ingredients for later freezing. It is useful when your schedule changes often, because you can prepare several portions at once and thaw only what you need.
Freeze soups, stews, casseroles, cooked grains, beans, and sauces in airtight containers or freezer bags. Avoid freezing high-water vegetables and creamy sauces unless you have tested the recipe, because they can separate or turn mushy after thawing.
How to Choose the Right Meal Prep Method
How should you weigh your schedule, cooking time, budget, and tolerance for leftovers?
Choose based on the point where your routine usually breaks down. If you skip cooking because evenings are busy, use complete portioned meals or batch cooking; if you get bored quickly, use ingredient prep or mix-and-match components.
| Your constraint | Best match | Practical setup | Watch for |
|---|---|---|---|
| Less than 2 cooking hours | Batch cooking | One-pot meal plus one vegetable | Plan for only 3 to 4 days |
| Variety matters most | Ingredient prep | Two proteins, two vegetables, one grain | Assembly still takes 5 to 10 minutes |
| Lowest food waste | Mix-and-match | Reuse ingredients across meals | Track produce freshness |
| Unpredictable schedule | Freezer prep | Freeze individual servings | Label dates and contents |
Budget Bytes recommends starting with one recipe and scaling up only after you know which leftovers you enjoy. A simple meal-planning routine for beginners can also prevent buying ingredients for more meals than you will realistically cook.
How many people are you feeding?
For one or two people, any method is manageable, but ingredient prep usually gives the best balance between variety and waste. A household can share base ingredients while adding different sauces, toppings, or proteins at serving time.
For 3 or more people, batch cooking is often cheaper and faster, especially for chili, soup, pasta sauce, rice bowls, and casseroles. Ask each person to choose one flexible component rather than preparing a separate complete menu for everyone.
How to Plan Your Meals for the Week
How do you choose recipes that share ingredients?
Choose 2 or 3 main recipes that reuse at least 3 ingredients. A roast chicken can appear in grain bowls, wraps, and soup, while a batch of roasted vegetables can serve with rice, eggs, or beans.
Check your pantry before shopping, then select ingredients with different uses. A basic pantry shopping plan helps you avoid buying duplicate grains, canned goods, spices, and cooking oils.
How do you balance proteins, vegetables, carbohydrates, and sauces?
Build each meal around a protein, a vegetable, a carbohydrate, and a sauce or topping. Examples include lentils with rice and roasted broccoli, chicken with potatoes and green beans, or tofu with noodles and cabbage.
Keep the sauce separate when it contains a lot of liquid. Add herbs, nuts, seeds, pickles, or fresh citrus at serving time to make repeated meals taste different without cooking another dish.
How do you make a shopping list and prep schedule?
- Write the number of breakfasts, lunches, dinners, and snacks you need.
- Check your refrigerator, freezer, and pantry before adding ingredients.
- Group the list by produce, proteins, grains, dairy, canned goods, and sauces.
- Schedule 90 to 120 minutes for a full session, or split the work into two 45-minute sessions.
- Reserve one flexible meal for leftovers, takeout, or food that needs using first.
What to Meal Prep for the Week
Which foods keep well in the refrigerator?
Cooked grains, beans, lentils, roasted root vegetables, cabbage, carrots, hard-boiled eggs, soups, stews, and cooked poultry generally hold up better than delicate produce. Store food in shallow containers so it cools more quickly and portion sizes are easy to reheat.
USDA Food Safety and Inspection Service guidance, checked in August 2026, recommends using most cooked leftovers within 3 to 4 days when refrigerated at 40°F or below.
Which foods are best stored separately?
- Keep salad greens away from dressings, tomatoes, and warm ingredients.
- Store sauces, dips, salsa, and gravy in small sealed containers.
- Pack nuts, seeds, croutons, chips, and fried toppings separately.
- Keep cut fruit separate from foods that absorb moisture or odors.
Which foods are better prepared fresh?
Prepare fried foods, sliced avocado, delicate berries, dressed greens, crisp bread, and finely cut herbs close to serving time. You can still wash or portion these ingredients in advance, but cooking or dressing them too early usually reduces texture.
How to Meal Prep in One Session
What should you cook first?
Start with the foods that take the longest, usually the oven dish, rice, beans, or slow-cooking protein. While those cook, wash produce, chop vegetables, mix sauces, and set out containers.
- Preheat the oven and start grains, beans, or stews.
- Chop vegetables and prepare raw ingredients while the first foods cook.
- Cook quick proteins and vegetables after the long-cooking items are underway.
- Mix sauces and portion cold ingredients near the end.
How should you cool, portion, and label meals?
Divide hot food into shallow containers instead of leaving a large pot to cool on the counter. The U.S. Food and Drug Administration advises refrigerating perishable food within 2 hours, or within 1 hour when the surrounding temperature is above 90°F, guidance checked in August 2026.
Write the food name and preparation date on each container. Refrigerate the portions you will eat within 3 to 4 days and freeze the rest once the food has cooled enough for safe storage.
How do you store sauces, toppings, and delicate ingredients?
Use separate 1 to 2-ounce containers for sauces and dressings, and add crunchy toppings only when you eat. Leave a little space in freezer containers because food expands as it freezes.
Do not put a sealed glass container straight from the freezer into a hot oven or microwave. Check the manufacturer’s instructions, and vent microwave-safe lids before reheating.
How Long Does Meal Prep Last?
What are the refrigerator storage guidelines?
Keep the refrigerator at 40°F or below and use cooked leftovers within 3 to 4 days, according to USDA guidance checked in August 2026. If food has been above safe temperatures for too long, smells sour, develops mold, or looks unusually slimy, discard it rather than tasting it.
Reheat leftovers until the center reaches 165°F, the USDA’s recommended temperature for reheated leftovers. Use a food thermometer for dense dishes such as casseroles, rice bowls, and stuffed foods.
When should you freeze meals?
Freeze meals when you will not eat them within the refrigerator window or when you want to prepare more than 4 days in advance. Mark the date, freeze individual portions, and thaw food in the refrigerator, in cold water changed every 30 minutes, or in the microwave.
Never thaw meat, poultry, seafood, or cooked meals on the counter. If you are unsure whether a dish freezes well, freeze one portion first and check its texture after thawing.
How do you keep food fresh all week?
Store food promptly, keep containers tightly sealed, and place older portions at the front of the refrigerator. Keep raw meat below ready-to-eat food to reduce the risk of drips and cross-contamination.
Discard food after a power outage if it has been above 40°F for 4 hours or more, following FDA guidance checked in August 2026. Contact a qualified food-safety professional or local health department if you need advice after a suspected contamination event.
Which Meal Prep Containers and Storage Essentials Do You Need?
- Use 3 to 5 cup leak-resistant containers for full meals, with microwave and dishwasher compatibility if you rely on either appliance.
- Choose shallow containers for rice, pasta, meat, and cooked vegetables so portions cool quickly.
- Keep 1 to 2-ounce containers for dressings, dips, and sauces.
- Use freezer-safe bags or containers for meals stored longer than 4 days, and remove excess air from bags.
- Keep a food thermometer, labels, a marker, and a clean cutting board available for safer preparation.
Glass handles stains and odors well but is heavier and can break, while plastic is lighter and usually cheaper. Never reuse a container that is cracked, warped, or missing a secure seal.
What Does a Simple Weekly Meal Prep Plan Look Like?
- Saturday or Sunday: choose 2 main meals, check supplies, and shop only for the portions you need.
- Prep session: cook a grain, a protein, and 2 vegetables, then make one sauce and wash fresh produce.
- Days 1 to 3: eat refrigerated portions and add fresh toppings at serving time.
- Day 4: use the final refrigerated portions or move a frozen meal into the refrigerator to thaw.
- Day 5: assemble a fresh meal from remaining ingredients, leftovers, or a freezer portion.
This plan gives you convenience without requiring every meal to be identical. If the routine leaves you with uneaten food, reduce the number of portions next week instead of preparing more efficiently.